
When you work in marketing for Oldcastle APG, you very quickly fall in love with their Belgard product line and want your own Belgard backyard. In fact, I had a Belgard Authorized Contractor help us transform our backyard back in 2011. But after continuing to learn and write about hardscape installations for all these years, I wanted to see whether I could put that theoretical knowledge into action and install a DIY project on my own.
My family owns a fishing camp on a lake in Mississippi, and one of our favorite things to do when we have a group there is to gather around a fire in the evenings with a guitar. Over the years, we’ve tried various incarnations of store-bought fire pits, all of which fall apart after a season or two. The most recent incarnation was a hodge podge of poorly stacked concrete masonry blocks. I really wish I had taken a “before” photo of it because it was an absolute mess — haphazard, weeds growing all through it, several blocks cracked or crumbling. You could hardly even tell it was a fire pit. It just looked like a pile of hurricane debris.
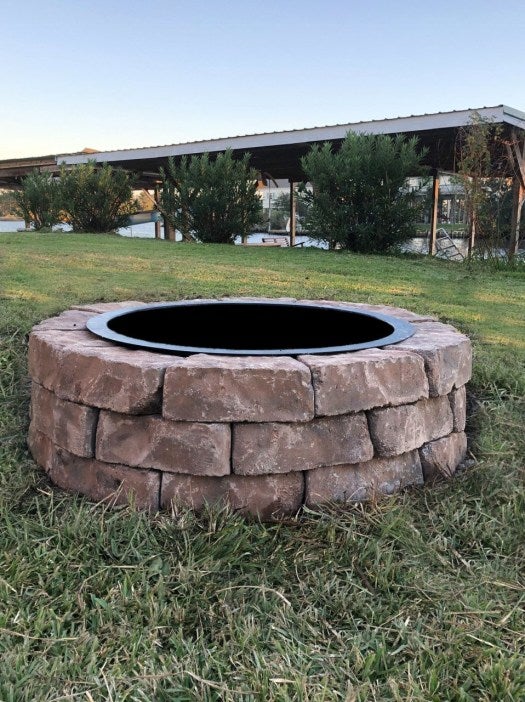
My husband and I decided to stay at the camp for our anniversary weekend, and since it was the season’s first cold snap, I really wanted to be able to build a fire. So the first thing I suggested when we arrived was to go to Lowe’s and buy a Belgard Ashland Fire Pit Kit. Building a fire pit was not my husband’s idea of a relaxing anniversary weekend, so he trudged to the store with me begrudgingly. I assured him that it would be an awesome project for us to do together, despite the fact that neither of us are what you would call “handy.”
Between info from the online installation guide and guidance from the helpful folks at Lowe’s, we left the store with everything we needed to do the installation:
- Fire pit kit (includes exact number of stones plus a metal liner)
- Paver base material (enough for 2″ base)
- Square shovel
- Hand tamper
- Lava rocks
- Level
- Rubber mallet
- Masonry adhesive and applicator gun
The fire pit kit came packed together on a pallet, and we didn’t have a pickup truck or a trailer (which would have worked better), but the Lowe’s folks helped us disassemble the kit so that we could load it into our SUV. We almost had to make two trips because of the weight, but were able to squeak by with one.
Prepping the Site
First we dug out the nasty old fire pit, keeping a watchful eye for any black widow spiders that might have taken up residence in the structure. They love that type of dark, moist environment — and we did dispose of more than one during the process. We then dug out a circular section of topsoil about 45″ wide and 2″ deep, making sure the spot was level when we finished.
Installing the Base
We filled the excavation with about 1.5″ of paver base, wet it and tamped it down with the hand tamper. I have to admit, I had fun handling the tamper. We then filled in the rest of the base and tamped it down again, making sure everything was level.
Laying the First Layer
As suggested in the installation guide, we placed the ring in the paver base to make an impression to use as a laying guide. The stones in the kit are specially shaped to fit together in a perfect circle, so it’s pretty dummy proof (even for us). But after we laid the first layer, we placed the ring over the layer to make sure that everything was lining up correctly, just in case. We then checked to make sure everything was level and used the mallet to make adjustments as needed.
Laying Additional Layers
For each of the next two layers, we beaded some masonry adhesive on the layer below and laid the stones so that the seams were staggered. We tapped each stone with the mallet to secure the adhesive and checked to make sure everything was level. Before moving on to the third level, we checked to make sure the ring still fit and that we weren’t getting off-course, using the mallet as needed to make adjustments.
Finishing Touches
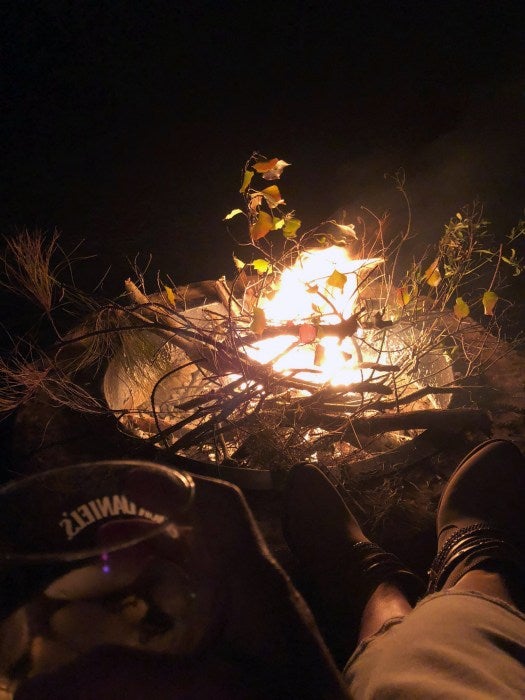
We placed the metal ring atop the inside of the fire pit, which gave it a nice finished look. We then filled the bottom of the interior with a few inches of lava rock. We then took some of the sod we had removed earlier and placed it around the exterior. The only thing left to do was gather some fallen limbs from the nearby woods, open up a nice bottle of bourbon and celebrate the rest of our anniversary by enjoying the fruits of our labor.
. . .